Creating a CMiC Service Account
This article covers:
An API service account is a special type of account used by applications, services, or automated processes to authenticate and interact with APIs, rather than being tied to an individual user. It is typically used for machine-to-machine communication and is often configured with specific permissions to access or modify resources within an application.
Why Use an API Service Account?
- Security: Avoids using personal credentials in automated scripts.
- Consistency: Ensures API access remains stable even if users change roles or leave the company.
- Scalability: Supports large-scale integrations.
- Granular Permissions: Limits access to only necessary API endpoints for security compliance.
When to Use Which?
If an automated process or integration needs access → Use an API service account.
If a user needs to manually interact with an API (e.g., testing via Postman) → Basic Auth may be sufficient but is not recommended for production.
- Setting up an CMiC API Service Account for Basic Authentication.
- Verifying the API Service Account.
- Authentication using Postman.
- Authentication using a browser.
If you are an existing CMiC Partner and would like API access or you're interested in becoming a CMiC Integration Partner, please reach out to CMIC Partnership.
CMiC Integrations API access
Step 1: Setting up a User Account to use as a API Service Account.
Creating a new user in CMiC. For best streaming results, use browsers Microsoft Edge or Google Chrome.
Step 2: Verify the User Account.
Using the User Account created in Step 1, login to CMiC application to verify accessibility.
Example front end login:
Client ID : SOLUTIONS (Supplied by CMiC Customer)
User ID : JSMITH (Supplied by CMiC Customer)
Password : ****** (Supplied by CMiC Customer)
Note: Tenant ID typically appears in the CMiC login credentials as in "ClientID".
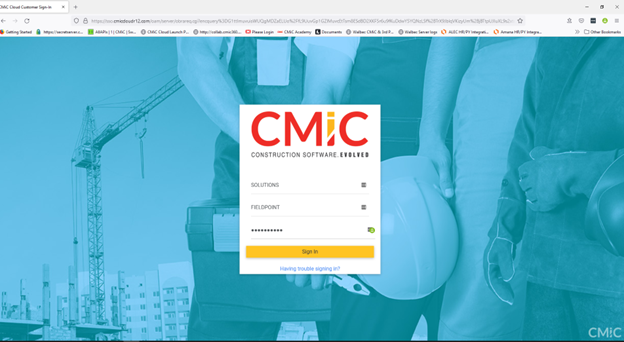
a: Launch the CMiC Login page and enter credentials.
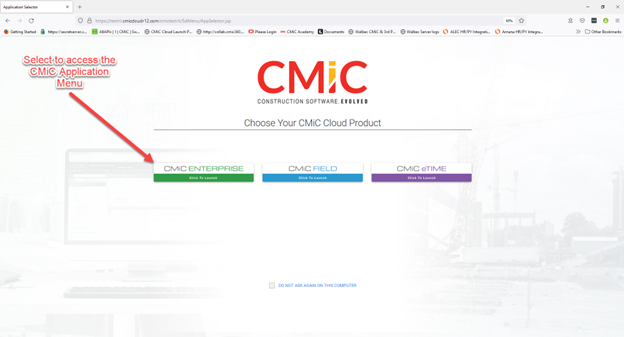
b: On login, select CMiC Enterprise for full Enterprise Menu
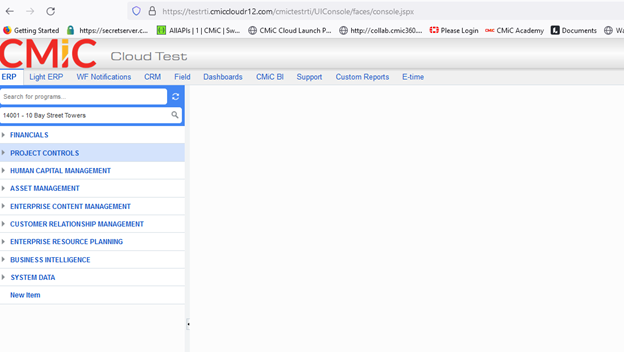
c: The CMiC Enterprise Menu contains the following modules:
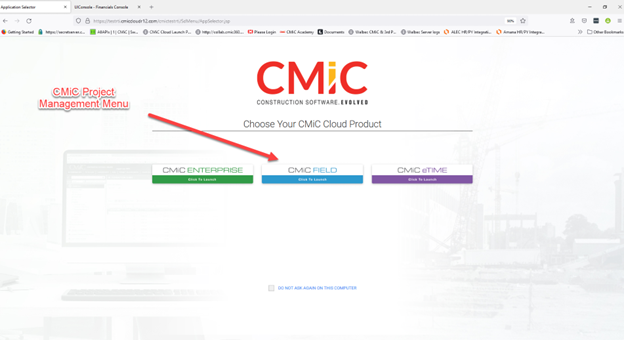
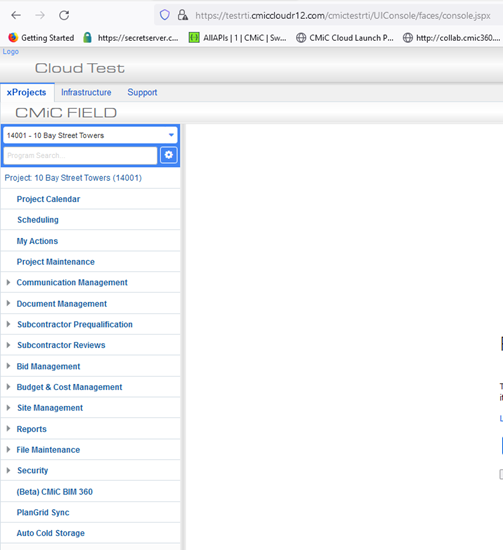
d: If CMiC Field menu is selected, you’ll be accessing CMiC Project Management Menu:
Additional resources:
If you are unable to see the displayed menus or access data after login, this could be due to security setup. System Security and User Management provides additional videos and knowledge articles on how to setup security for a User Account (API Service Account).
Navigating back-end API access
Using the same User credentials from Step 2, you can authenticate using Postman or a browser.
Step 3: Authenticate with Postman.
To download the Postman application, go to Postman
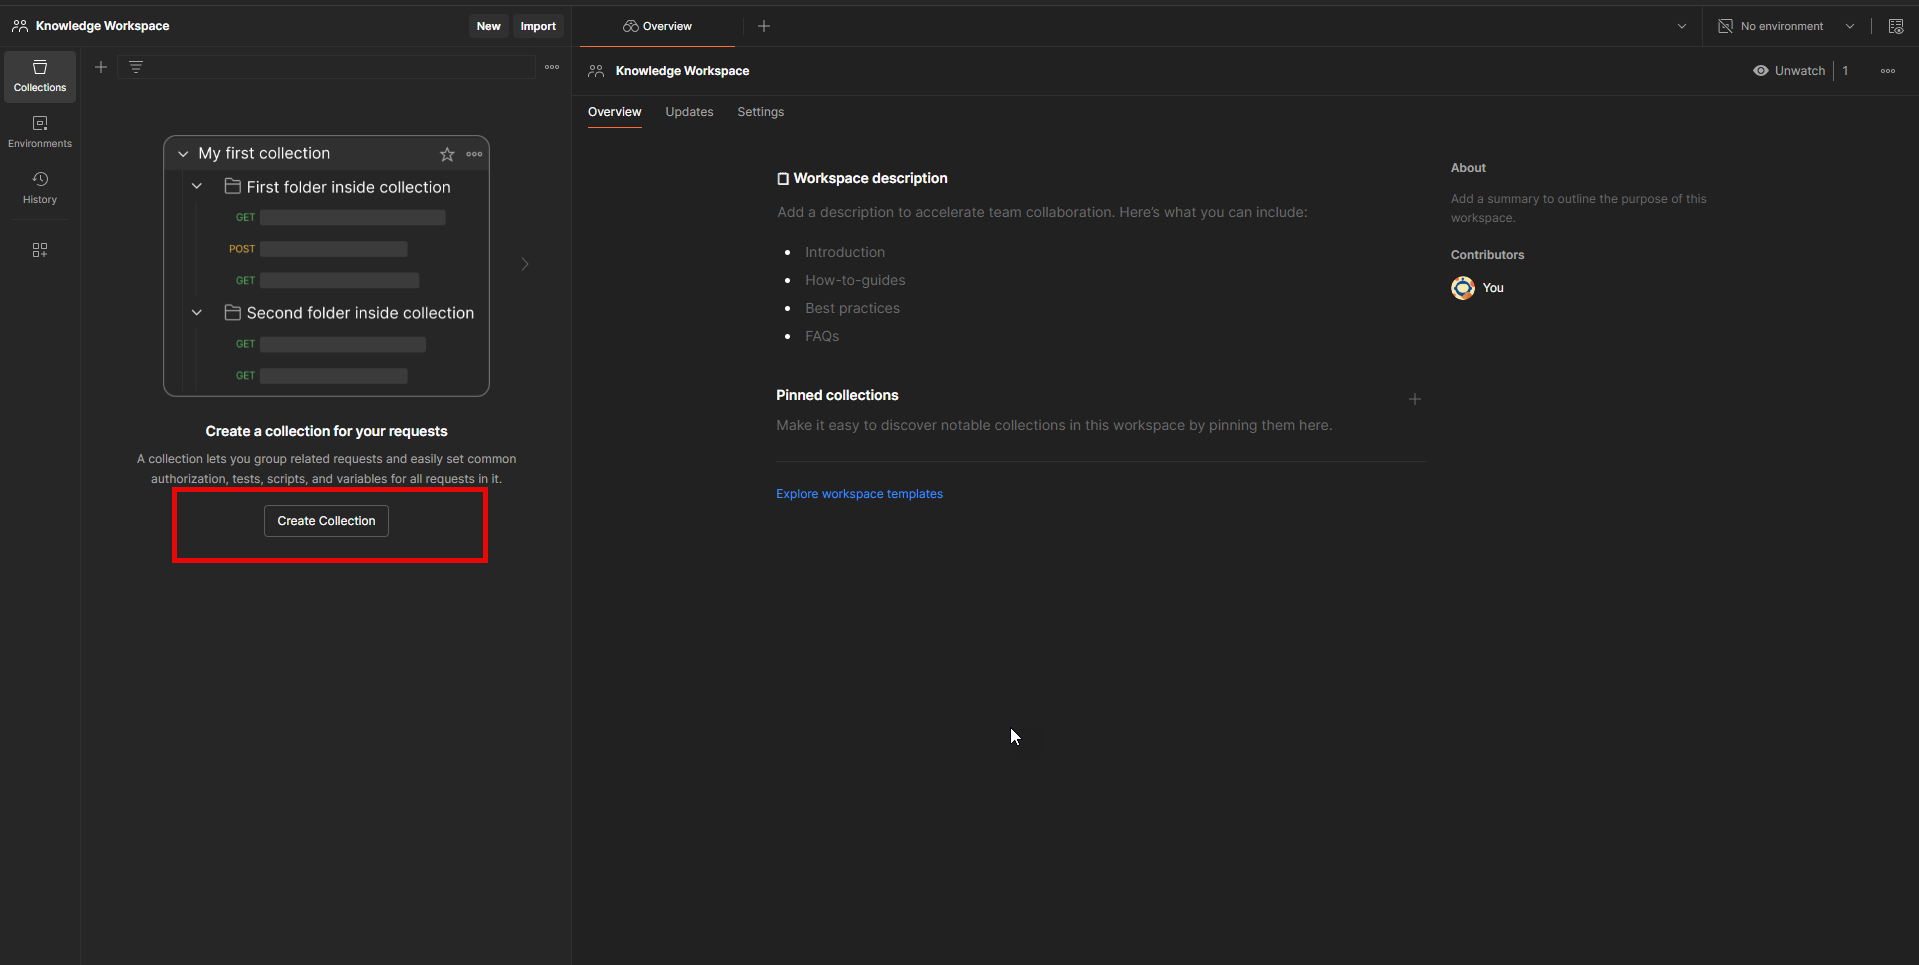
a: Create a collection in Postman.
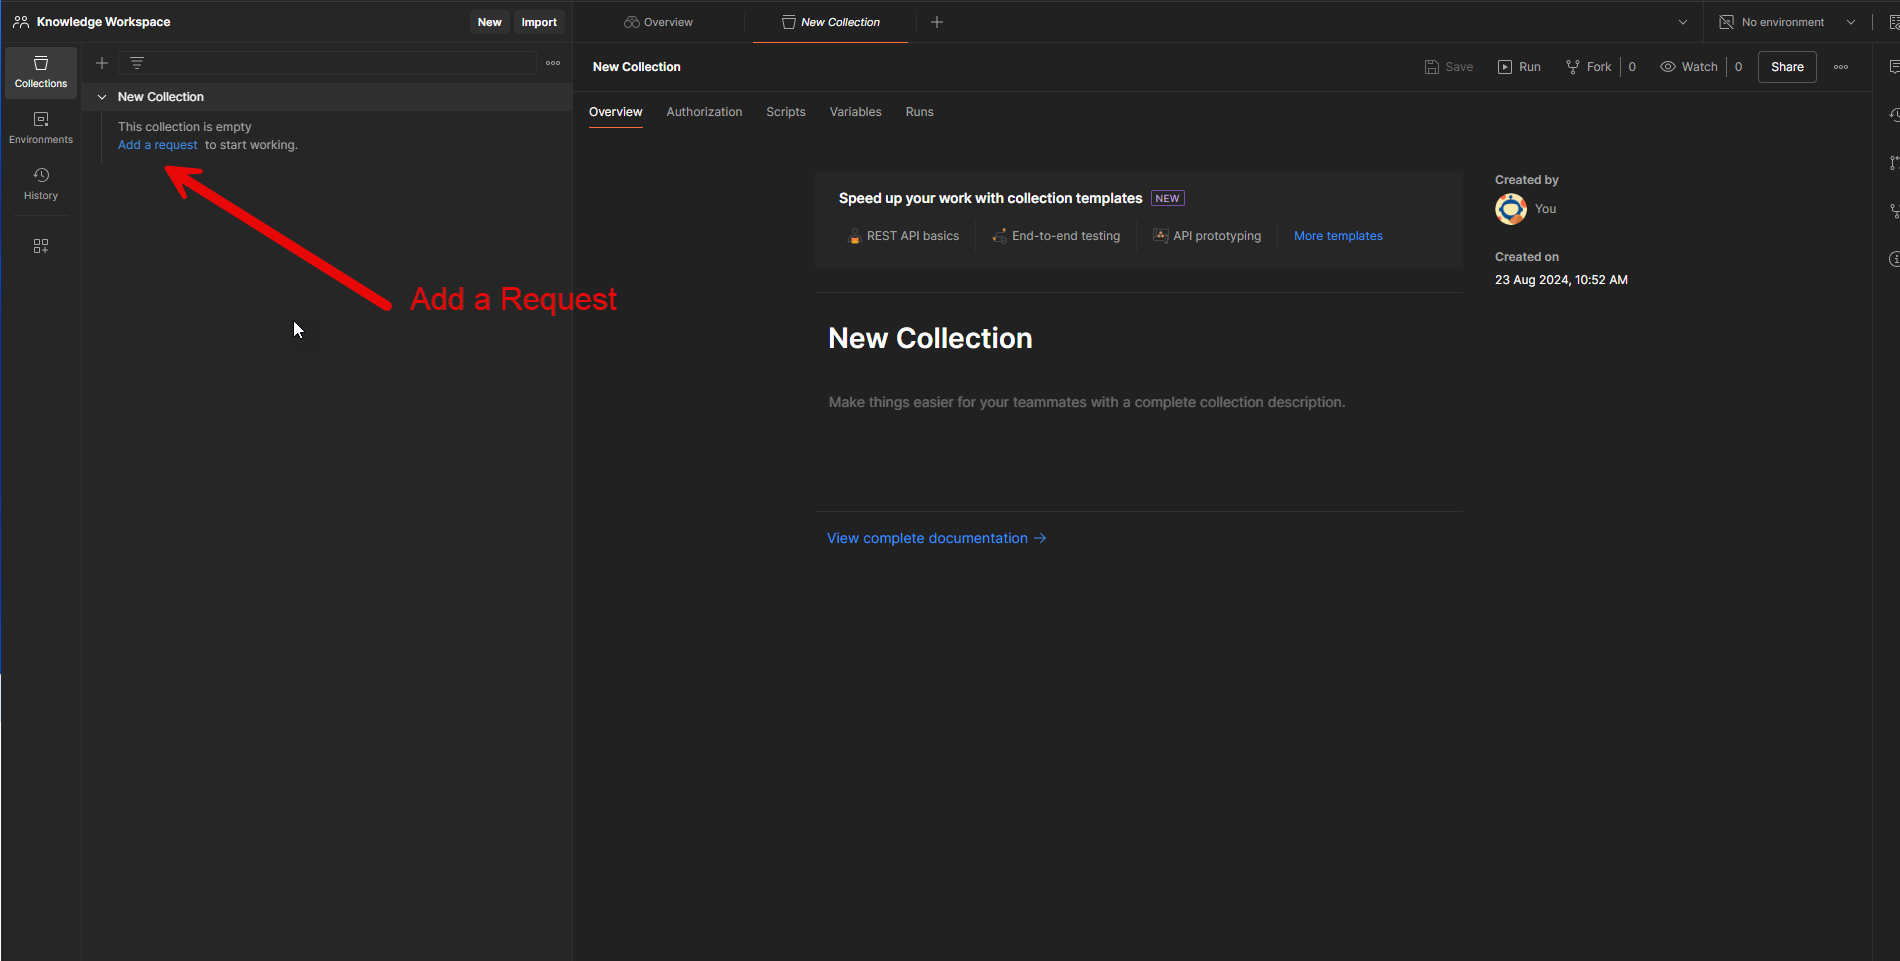
b: Add a request.
c: Enter your CMiC domain and server along with the API endpoint you'd like to use.
For a full list of available APIs, go to CMIC Developers Website
For a full list of available CMiC Cloud Domains and Servers, go to CMiC API Server URLs
The example below is using the Project endpoint
There are two approaches to authentication in Postman: directly on the request or by using Environment variables. In this example, we will set up a Postman Environment to embed our authentication variables. This is so we can mask the credentials in our request.
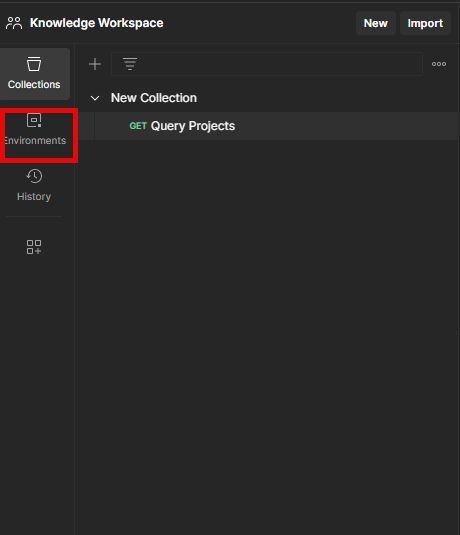
d: Navigate to Environments from the left navigation pane:
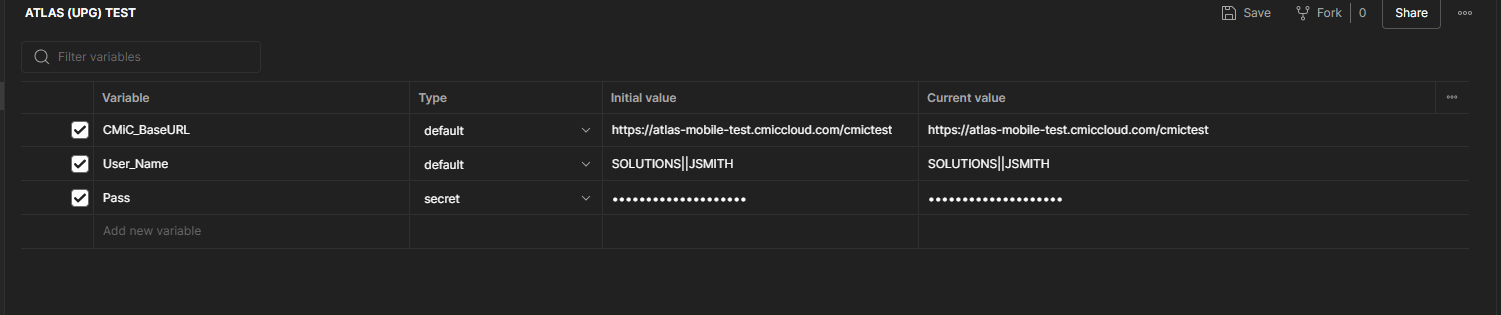
e: Enter your domain/server, user, and password variables with value as shown below.
Variable 1 : Create a variable for the domain and server URL,
Example | CMiC_BaseURL |Type: default | Initial Value: https://atlas-api-test-cmiccloud.com/cmictest
Variable 2: Create a variable for User ID.
Example | User_Name | Type: default | Initial Value: SOLUTIONS || JSMITH
Variable 3: Create a variable for password.
Example | Pass | Type: default | Initial Value: *******
f: Return back to your collection. On the collection header, select Authorization tab. Select Basic Authentication and embed the user and password variables into the Username and Password fields.
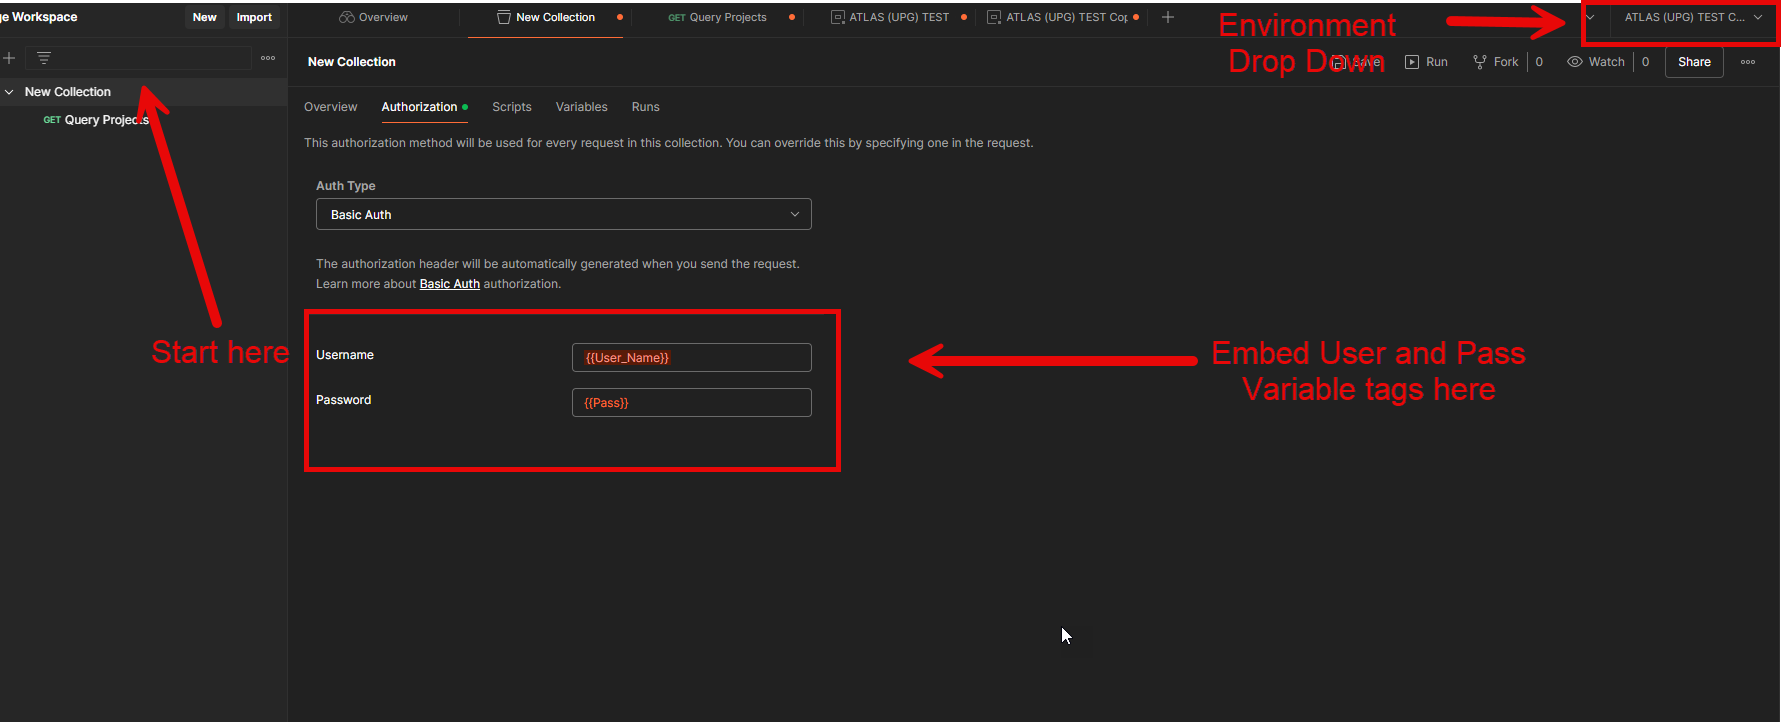
Auth type: Basic Auth
Username: {{enter variable for user}}, example {{User_Name}}
Password: {{enter variable for password}}, example {{Pass}}
Switch your Environment drop down (top right of screen) to point to the environment variables defined under Step 3, section d:.
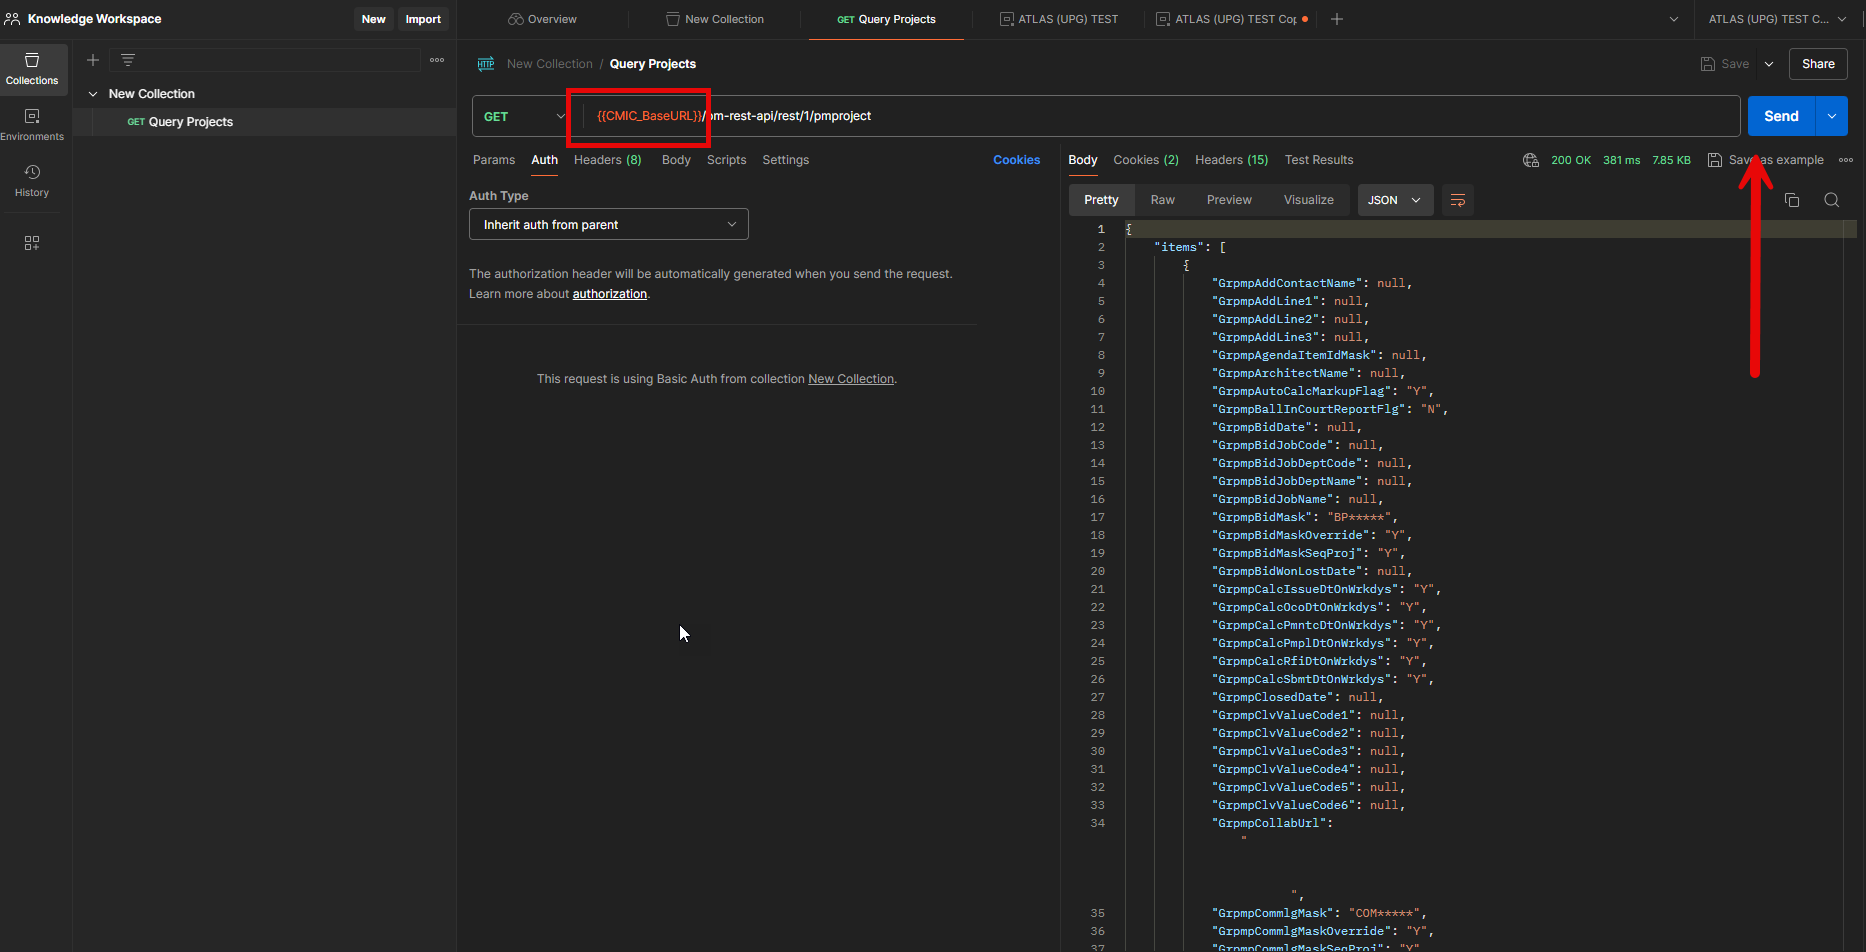
g: Finally, return back to the API request setup earlier, and embed the base URL variable with the endpoint URL as shown below.
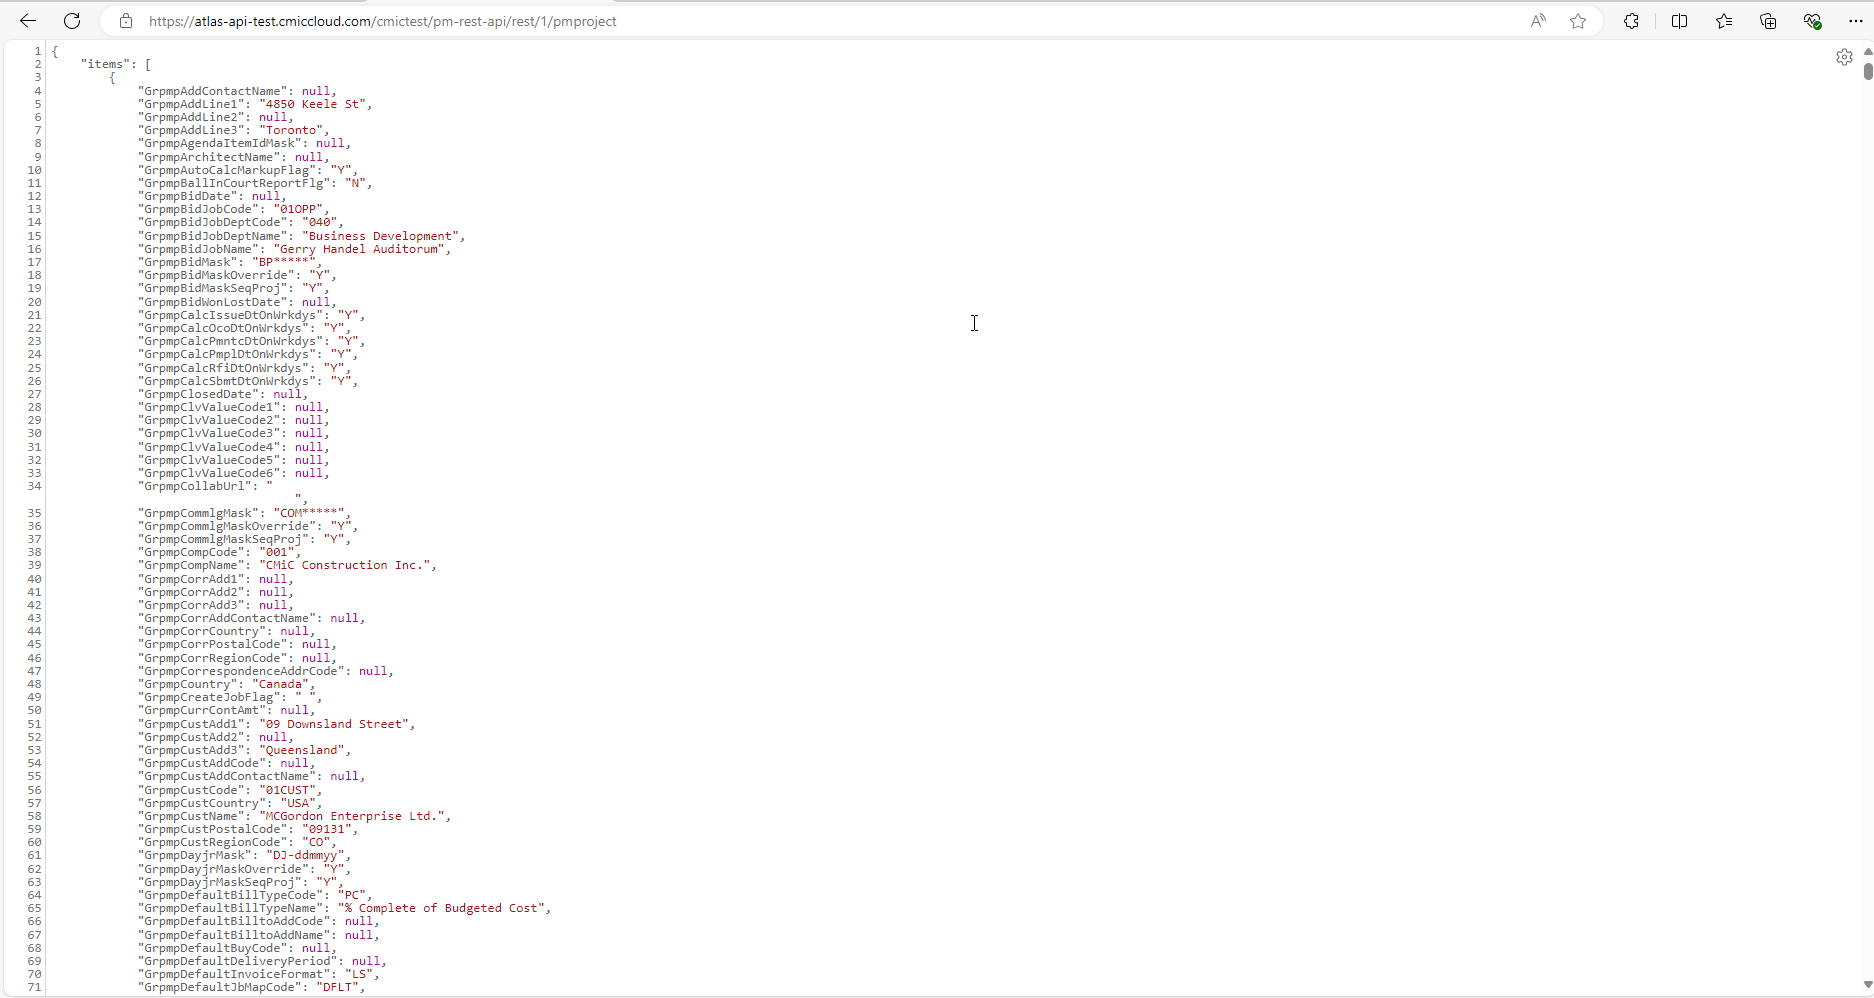
Next, test your authentication by sending a request, using the same request created earlier. For this example below we are using the PM Project endpoint
You should receive request response with a http status code 200 OK to signify a successful authentication, as shown in the screenshot below.
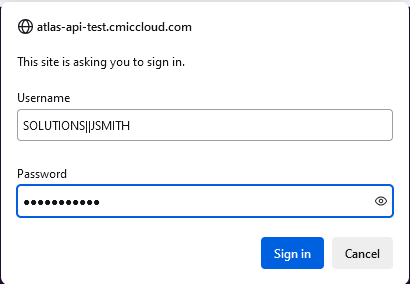
Step 4: Authenticate using a browser.
a: Copy and Paste the API URL with embedded CMiC domain and server into any browser.
Example, we're using,
https://atlas-api-test.cmiccloud.com/cmictest/pm-rest-api/rest/1/pmproject

b: You'll be immediately prompted to authenticate. In this case, use the same user credentials from Step 1 following this format:
CLIENT ID||USER ID | Example: SOLUTIONS|| JSMITH
PASSWORD

c: On Sign-in, you're results should look similar to the below: