Introduction
This documentation provides a guide on the PM Document Upload Function, which facilitates easy file uploads within our project management system. Through this feature, authorized users can efficiently upload and manage project-related documents, ensuring seamless collaboration and organized document storage.
Procedure: Uploading Files via PM Document Upload Function through the Front End
Step 1: Access the PM Document Upload Page
Log in to CMiC Field using your credentials. Upon logging in, select the appropriate project, then select Document Management - Documents, to be directed to the page displaying associated Folders/File Types for this project.
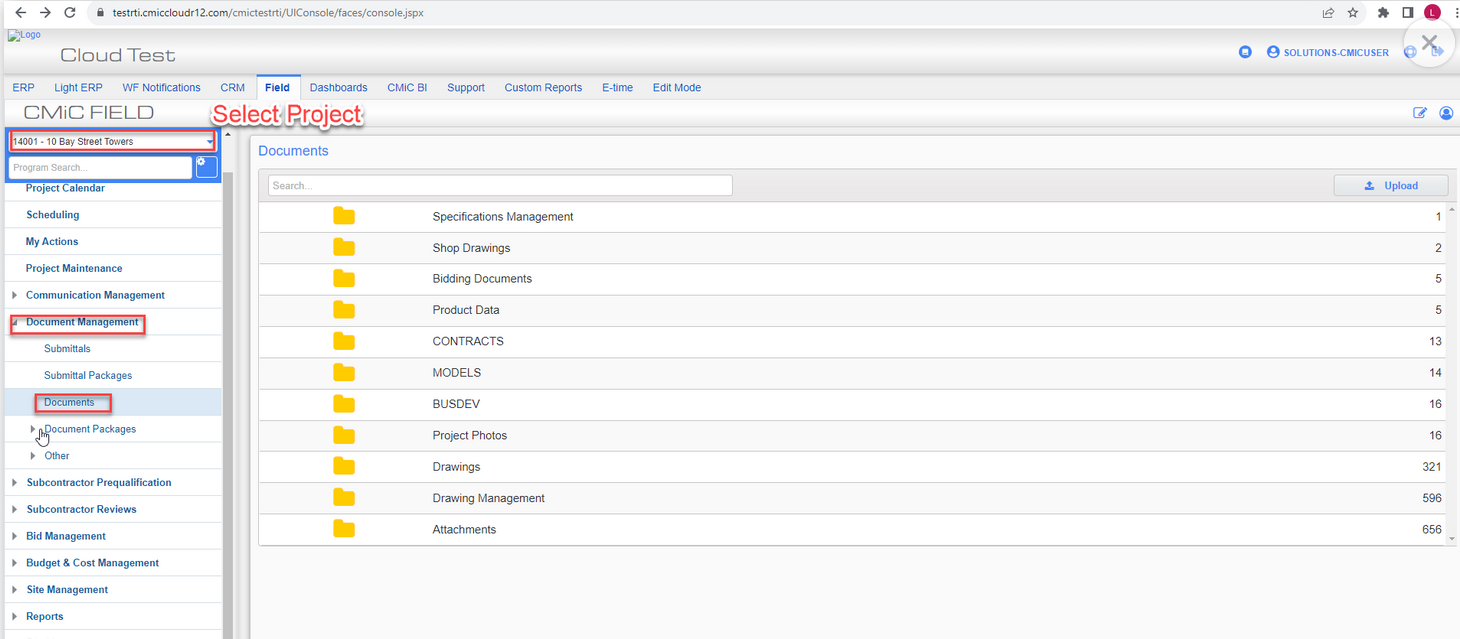
Step 2: Select the Desired Folder/File Type
Identify the desired Folder or File Type where you want to upload your file.
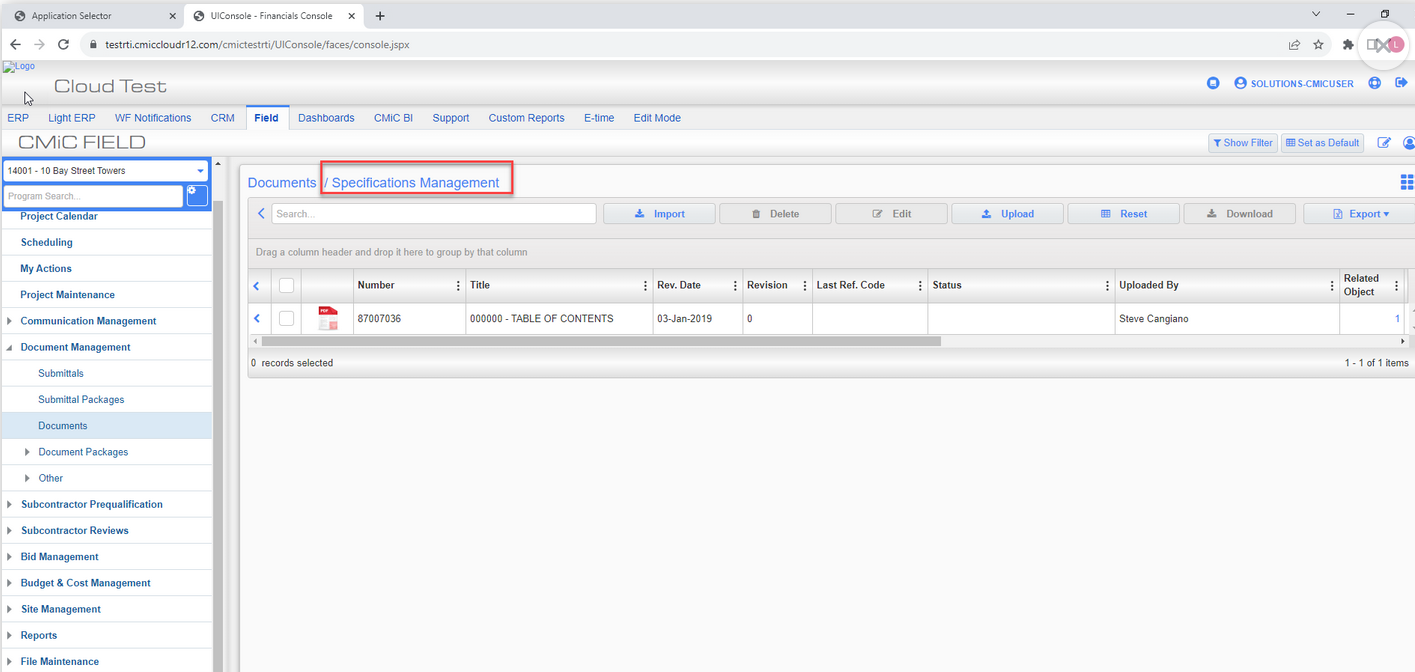
Click on the respective Folder or File Type to access its contents.
Step 3: Upload a File
To initiate the upload, utilize the "Upload" button available on the page.
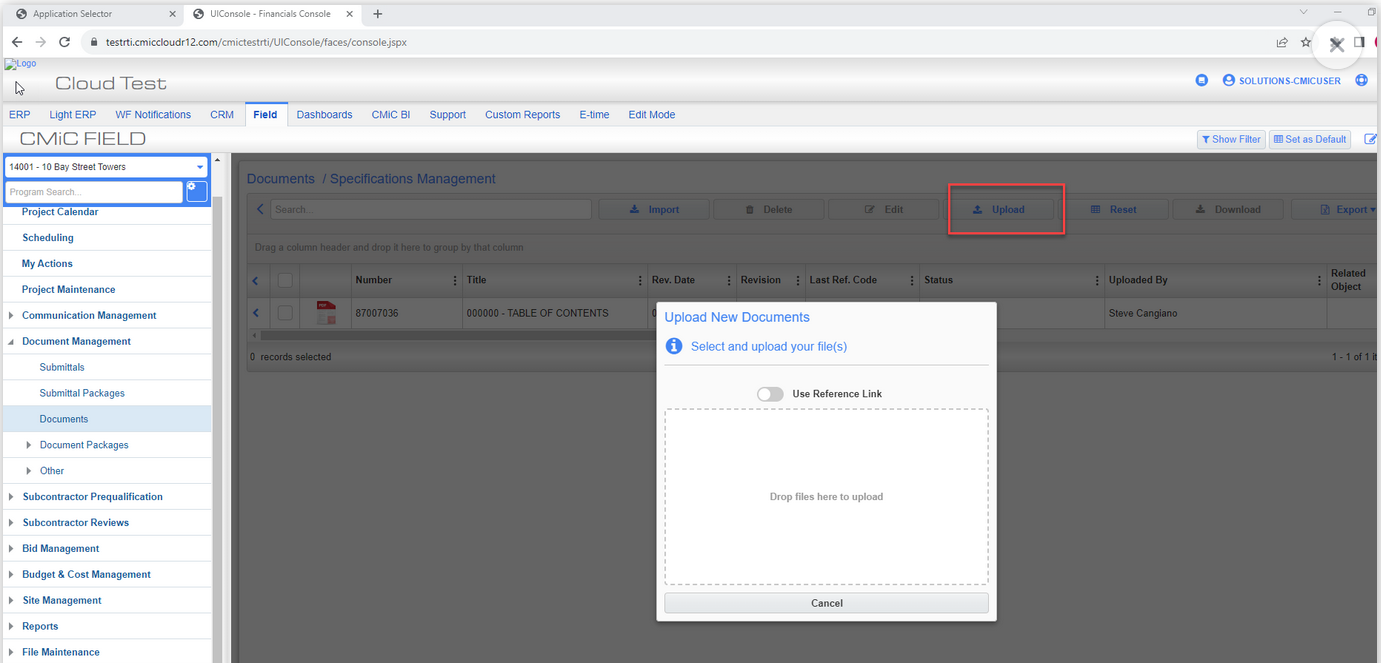
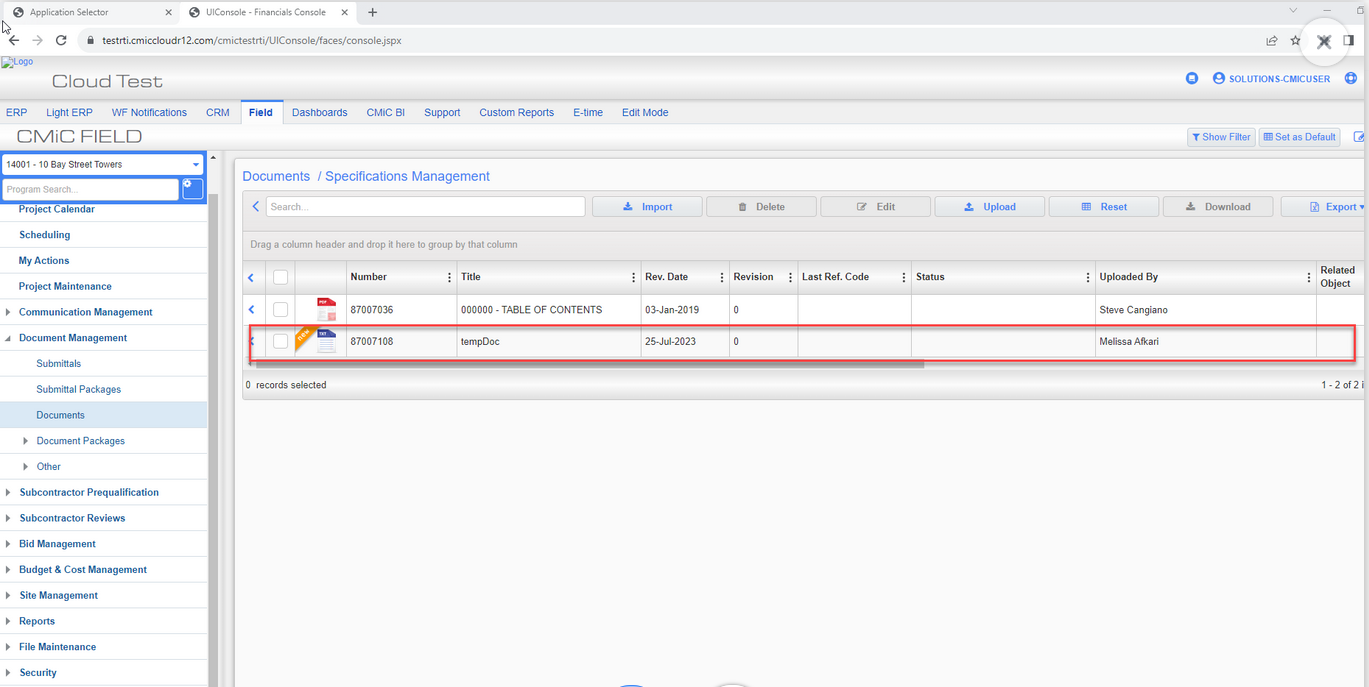
Step 4: Confirm Successful Upload
Upon selecting the file, the system will automatically commence the upload process.
Procedure: Uploading Files via PM Document Upload through CMiC API (Replicate the same process shown above)
Step 1: Access the UploadDoc Endpoint under pm-doc-rest-api
Utilize the "uploadDoc" endpoint, specially designed for file uploads, through an POST request.
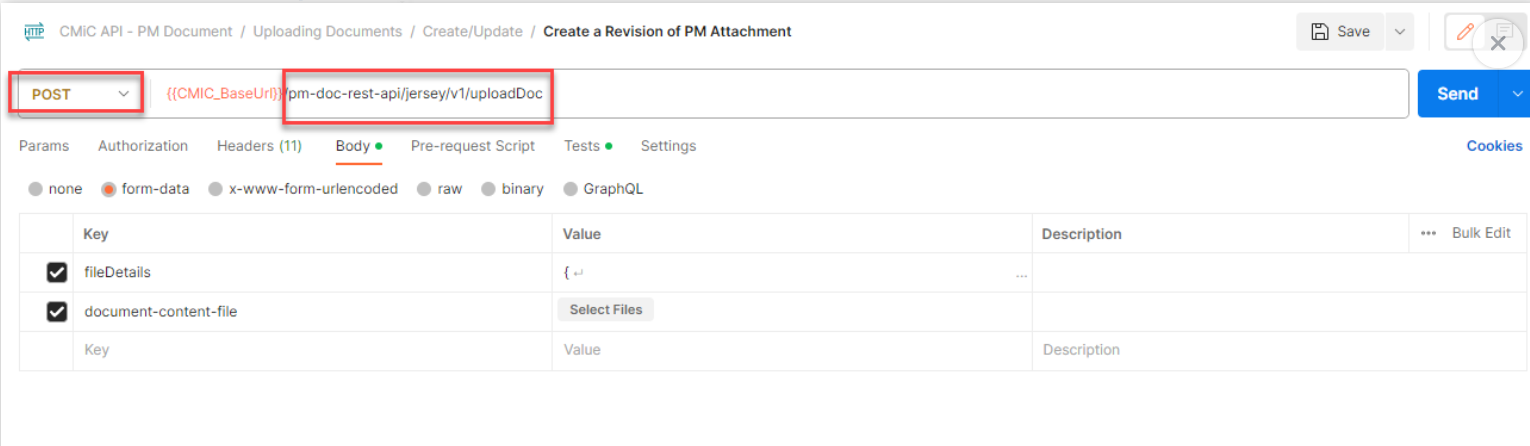
Step 2: Prepare the Required Payload
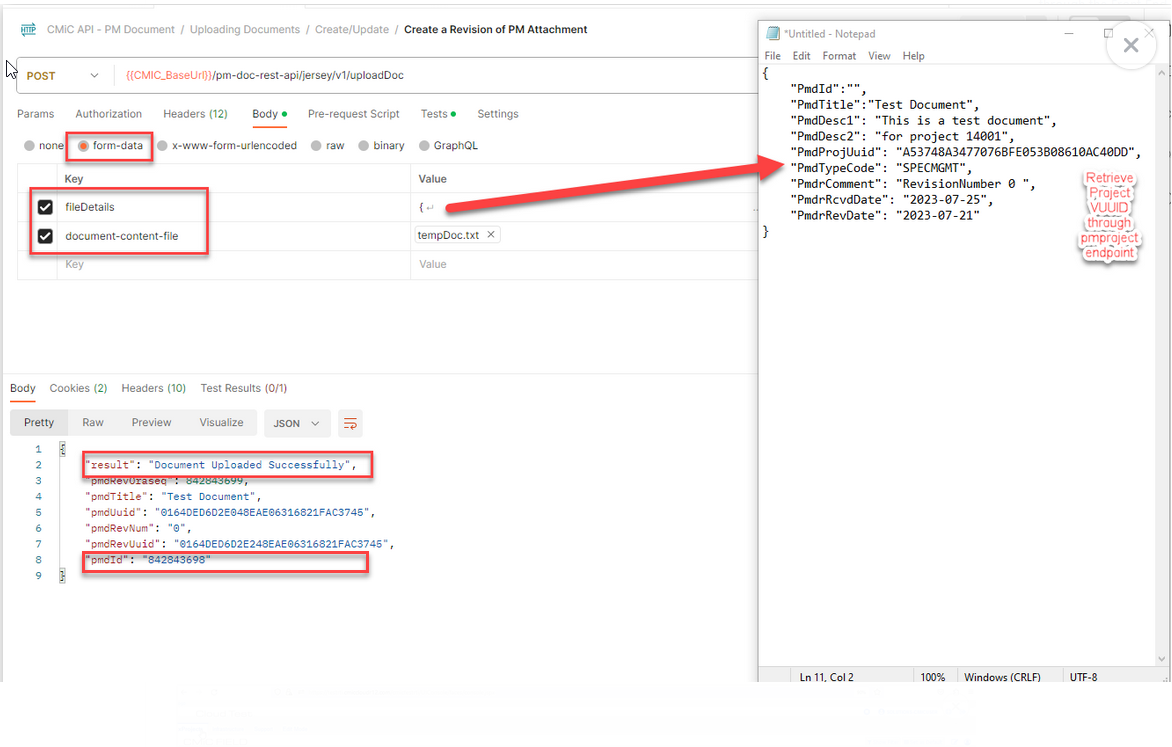
Ensure the API request payload includes essential data for successful upload:
Here are the required payload with explanation:
{
     PmdProjUuid: Project UUID,
     PmdTypeCode: Document Type (i.e., RFI, DRAWMGMT, etc.),
     PmdId: document name,
     PmdDesc1: test description 1,
     PmdDesc2: test description 2,
     PmdrComment: document comments,
     PmdrRcvdDate: Received date (YYYY-MM-dd),
     PmdrRevDate: Revised Date (YYYY-MM-dd)
}
Tips:
"Project Uuid": Obtain the Project Uuid by making an API call to the "pmproject" endpoint
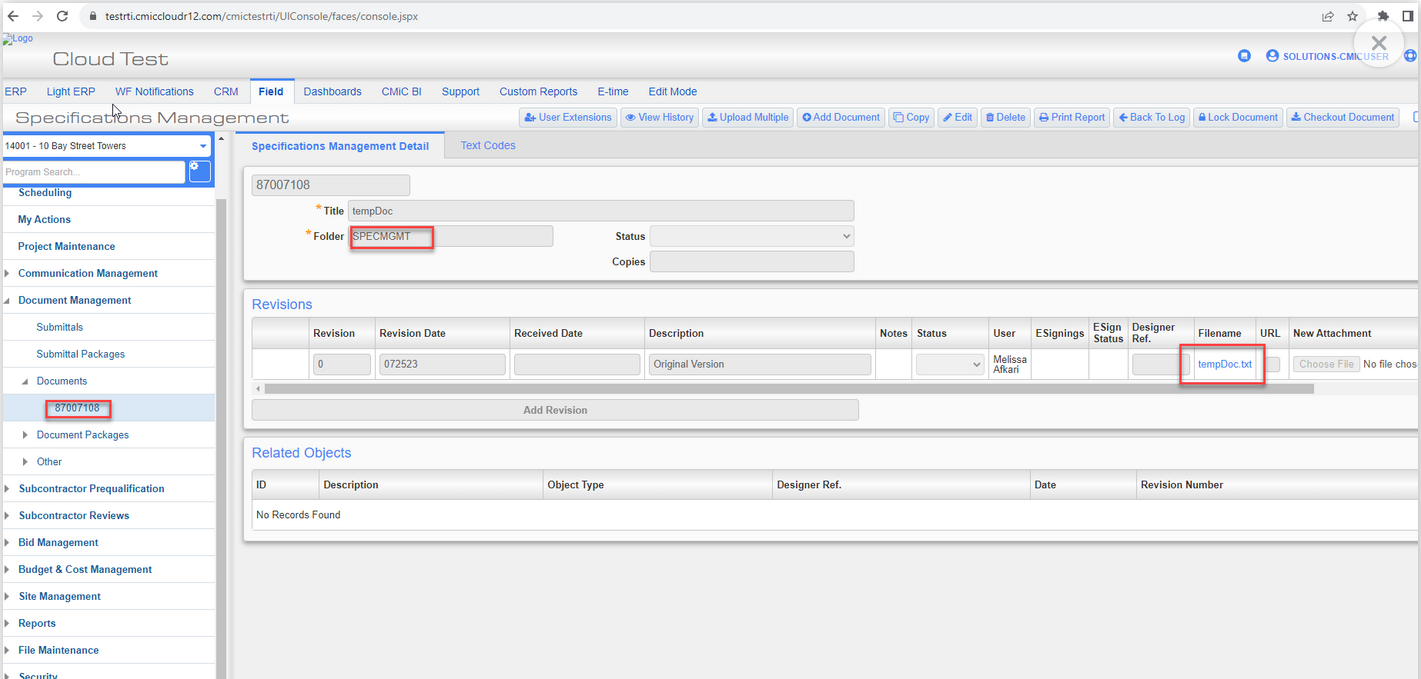
"TypeCode": Retrieve the TypeCode by navigating the front-end UI, as shown in the below diagrams.
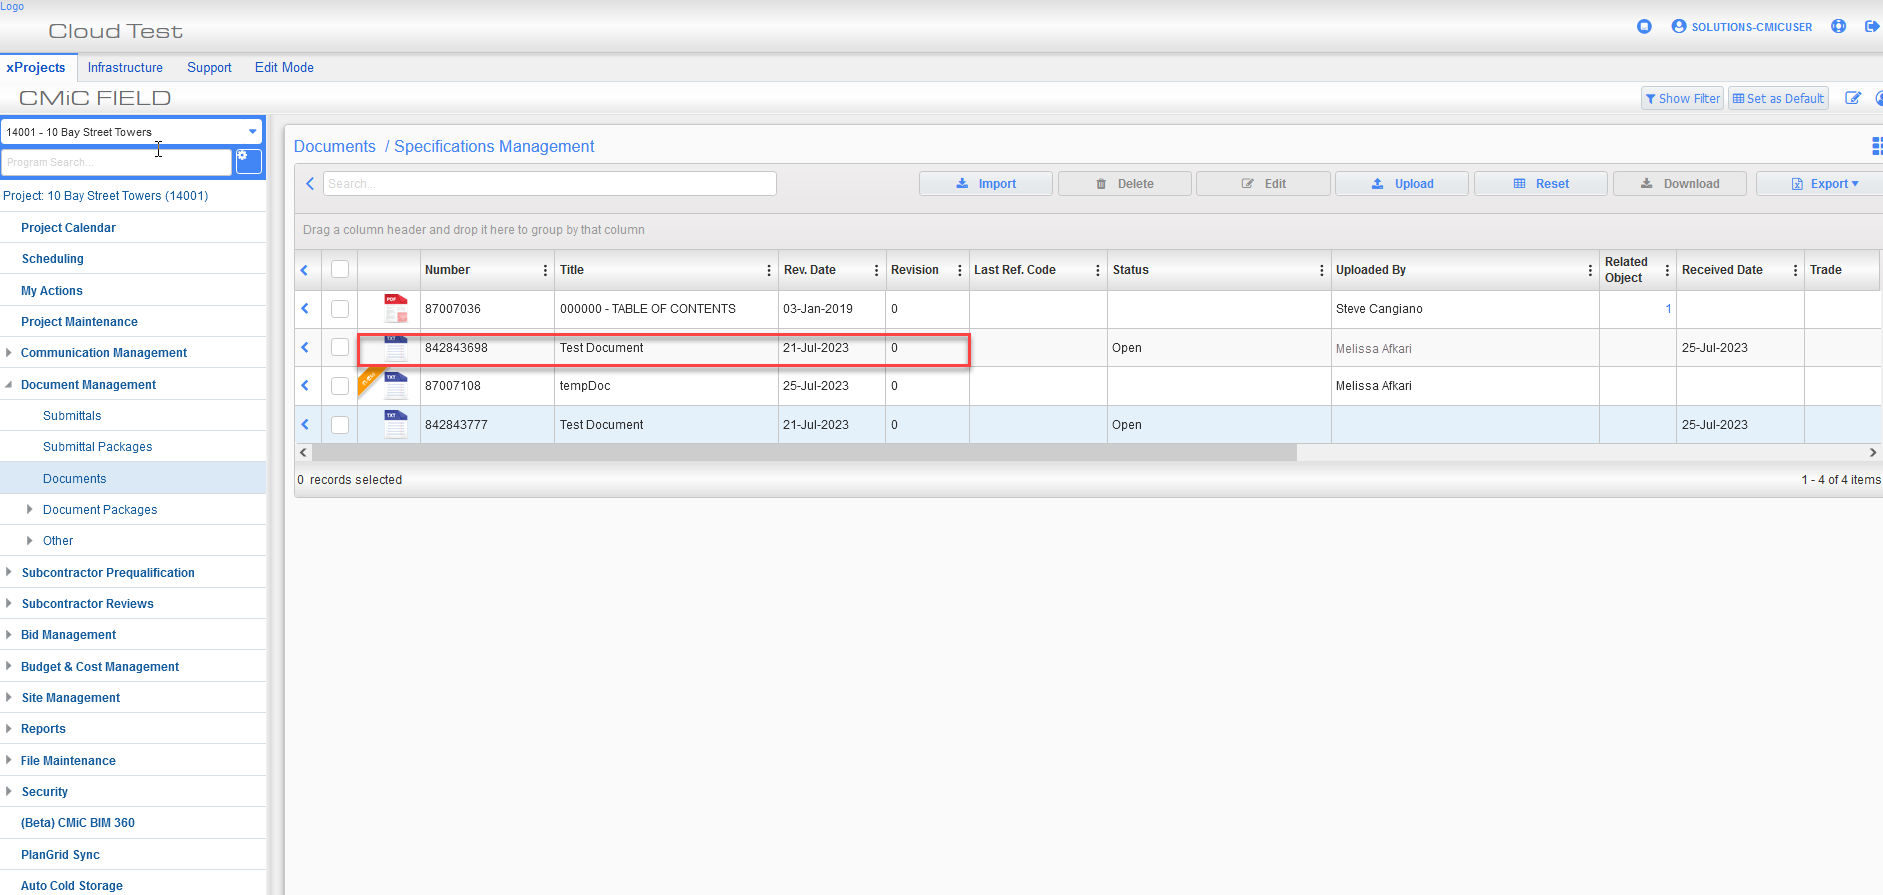
Step 4: Confirm Successful Upload
After processing the API request, the system will respond with a success message, confirming the successful upload. The document uploaded will also show in the front end.
Note: The uploaded document can be linked to a CMiC Object.
The required payload incorporates additional information on the object the document is associated with. For example:
{
   "PmdProjUuid": "Project UUID",
   "PmdTypeCode": "Folder name",
   "PmdId": "Docoument Id",
   "PmdTitle": "Document title",
   "PmdDesc1": "Description 1",
   "PmdDesc2": "Description 2",
   "PmdrComment": "Original Document",
   "PmdrRcvdDate": "2021-10-15",
   "PmdrRevDate": "2021-10-15",
   "PmdObjectType": "Type",
   "PmdObjectId": "Id",
   "PmdObjectId2": "Id",
   "PmdProjCode": "Project code",
   "PmdCompCode": "Comp code",
}